Hitachi 101
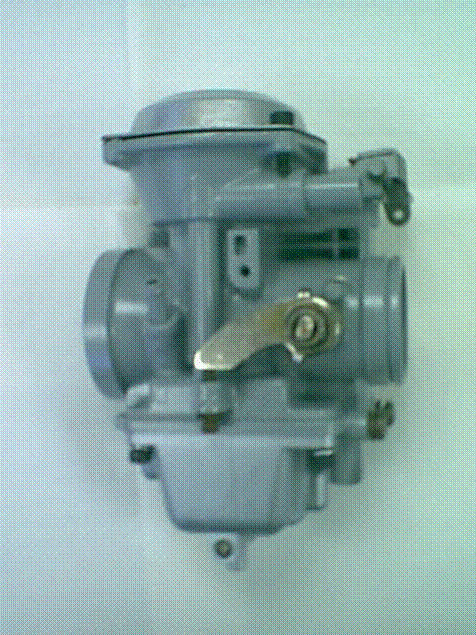
Here is a single Hitachi carb. Both are put together the same but this is the complete breakdown of how they work.
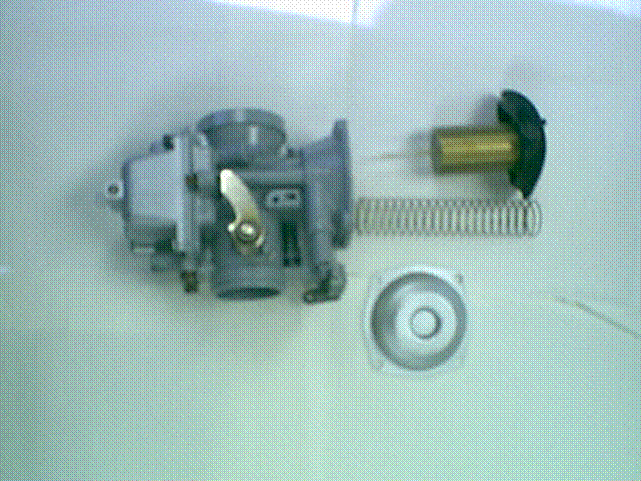
When you pull the top off you will see the slide spring come out first. It is a long spring, kind of like a slinky. After that the slide will come out. The main needle
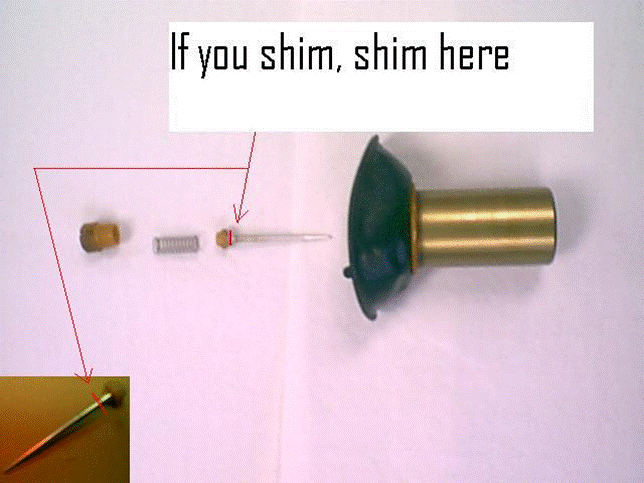
is under a crew cap down in the slide. Some models have a pin set in the bottom that cocks the needle to the side. If yours has this you need to notch the plastic base of the needle to set flat on
the slide base. This is done to stop the needle from spinning in the bore and stop the ware of the main jet emulsion tube do to the needle in constant contact of it.
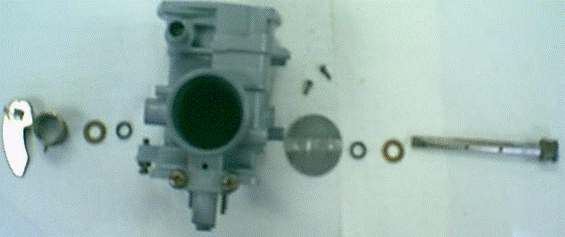
Here is the breakdown for the slide and the internal parts. Check the needle for ware, clean all parts and put back together. Make sure you hold the diaphragm up to the
light and check for pinholes. If any are found use a sealer like “Seal-All” to fix.
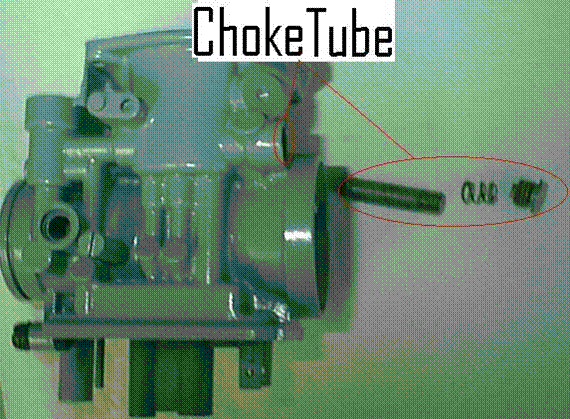
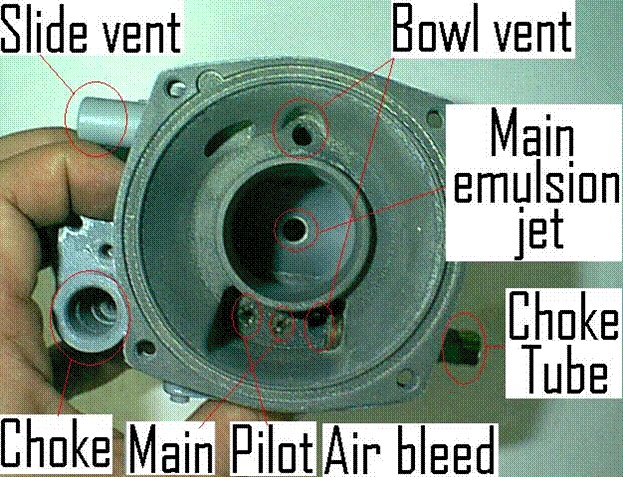
Make sure you remove the choke tube to get to the Air jets in the slide chamber. Depending on the year you may have an Allen head plug keeping it in or a pressed in bung. If yours is pressed in drill a hole in it insert a screw and pull the bung out. You can get a new plug from your local hardware/plumbing store. Get a ¼ inch copper plumbing cap (solder type). You will need to trim access off after install. Once you get the plug out there is a spring and a tube.
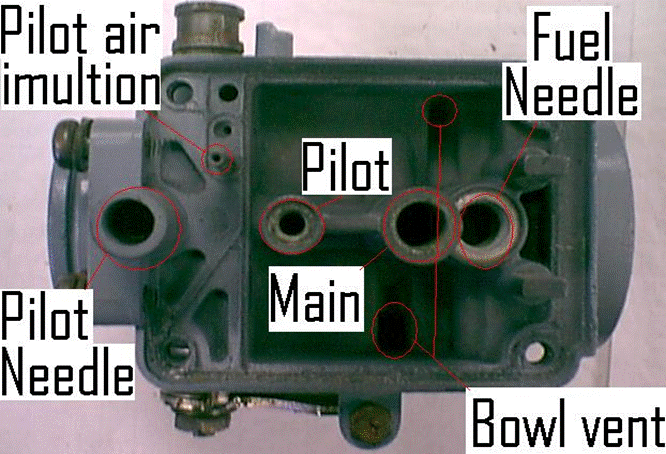
Under the choke tube is the Air Jets for the Main emulsion, Pilot emulsion and bowl vents. Insure these are free and clear of obstruction.
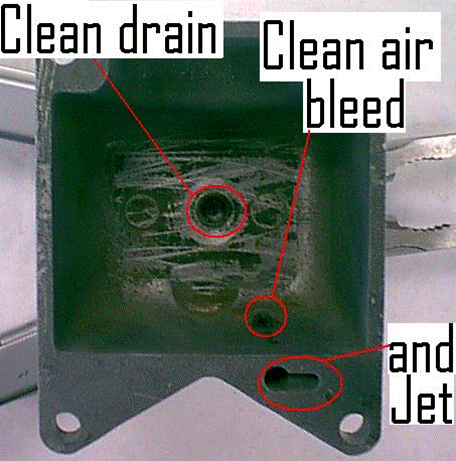
Lets move to the bottom. Pull the float bowls and flip the bowl over. You need to ensure the drain and pilot jet emulsion tube system is clean and clear. Be advised there is a small jet at the bottom of the emulsion canal It will take some time to clean but if not done your choke will not work. Do not drill this out as making it to big will cause your choke to run very rich. Use a torch tip cleaner to clean it.
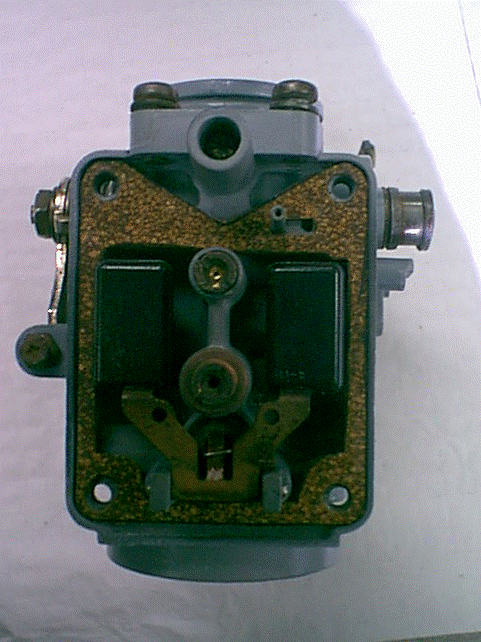
When everything is put together it looks like this.
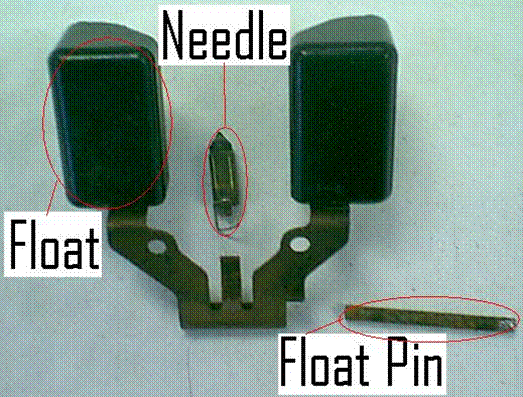
The first thing you need to do is pull the retaining pin for the float and remove the assembly. Check the float for holes. Shake it, if you hear liquid then it is shot. Get a new one or repair with epoxy.
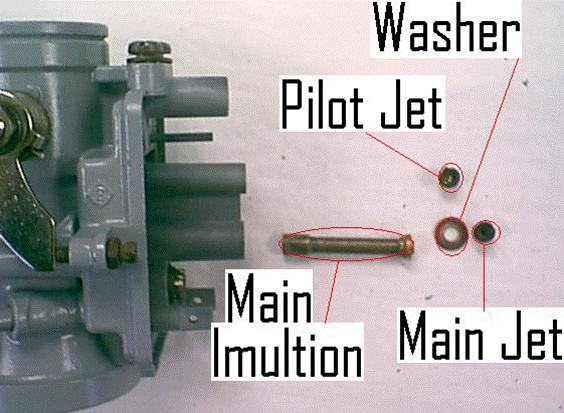
Now pull the main jet and pilot jet. On some models the pilot is pressed in and can not be removed. Simply clean in place if you have this kind. The main emulsion
slides out the top with a slight tap.
Also pull the needle assembly and clean the small fine mesh screen under the needle seat. If it is good repair keep it, however if not, discard it.

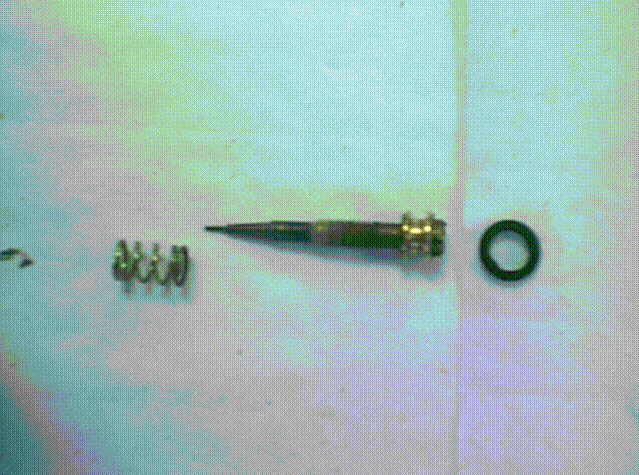
Also pull the pilot needle. There is a small O-ring that will need to be checked and lubed.
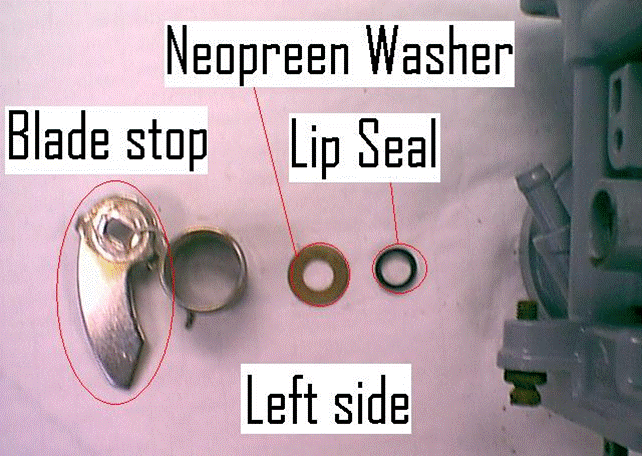
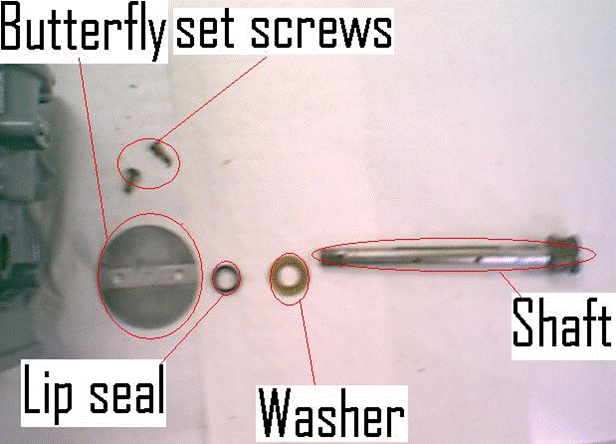
A commonly overlooked area is the butterfly assembly. There are two lip shaft seals that need to be checked for damage and greased if they are in good repair. If you
try to remove the small screws holding the butterfly in place be advised that they are staked and will need to be replaced. I very rarely ever remove them without breaking or stripping the
head.